
Following on from the set-up for this section, we’re going to create a circuit which switches on and off on LED.
For this circuit you will need:
- An Arduino Board.
- A piece of breadboard.
- 1 – 10kΩ resistor.
- 1 – LED
- 1 – push button
The anode, cathode, and general orientation of an LED is shown in a schematic like this:

")
This is a simple schematic of the circuit.The begging of which will be connected to the 5v rail on the breadboard, and the end will be connected to the ground (GND) rail.
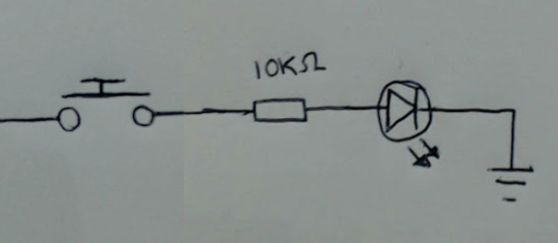
By pressing in the button in, the LED will light. As soon as the button is no longer being pressed, the light will go off once more.
Here’s the actual circuit shown below:


